Buffer group of neighboring polygons preserving attributes and topology
This article presents an approach for buffering a group of neighboring polygon and preserving the common internal boundaries, topology and attributes of the input.
In this article used only functions available in ET GeoWizards 12.0
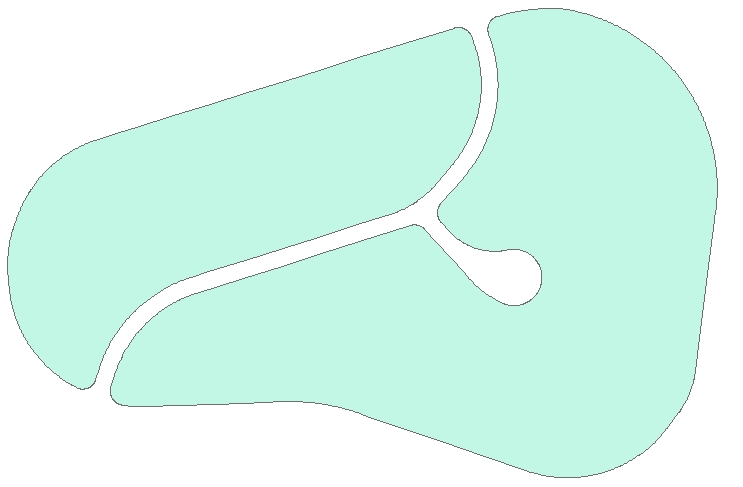
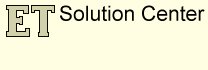
STEP 1: If we use the Buffer function without dissolve fields selected , we will lose all the internal boundaries and will get the correct outline of the polygons after the buffer is aplied.
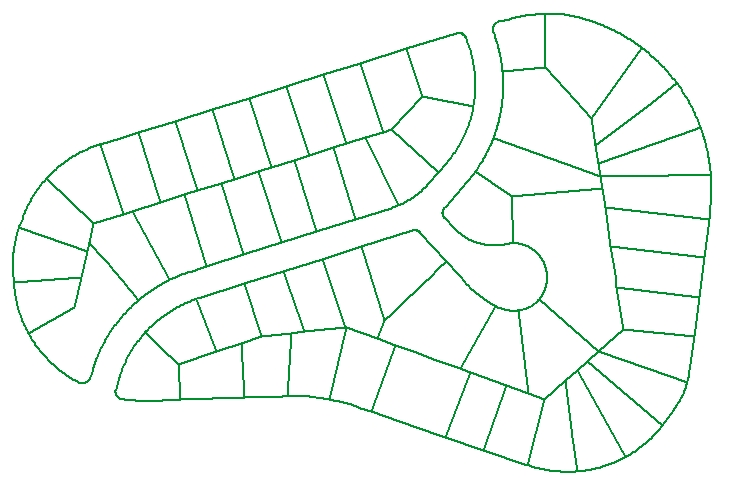
STEP 2: Use thePolygon To Polyline function on the Buffered - Dissolved polygon to convert the external boundary to polyline. Now we need a way to add the internal boundaries.
STEP 3: Use thePolygon To Polyline function on the original polygons. This will give us all the outlines. We need only the internal ones.

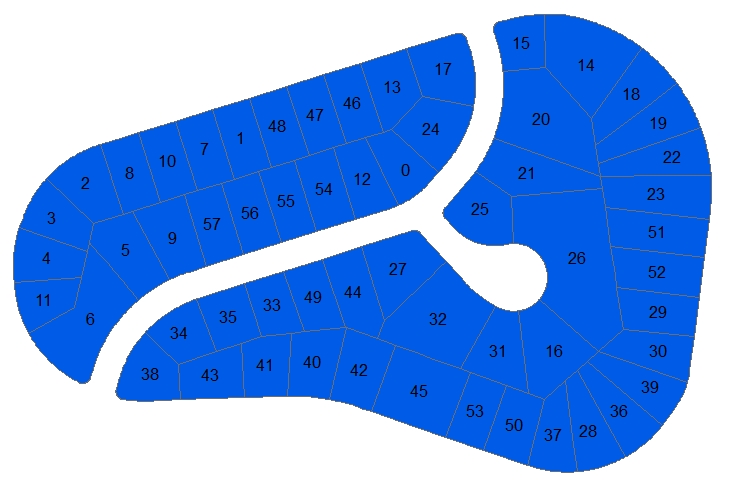
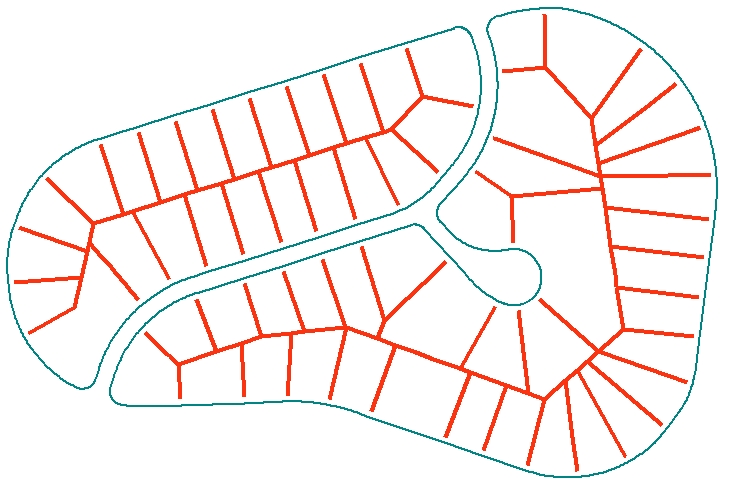
STEP 4: Use the Clean Polylines function on the polyline dataset created in STEP 3. Use the "Export Duplicates" option because the duplicates indicate the common boundaries between two adjacent polygons. So the duplicates (red in the picture) are our internal boundaries.
STEP 5: Use the Merge Datasets function on the polyline datasets created in STEP 2 (buffered outline) and STEP 4. (internal boundaries).
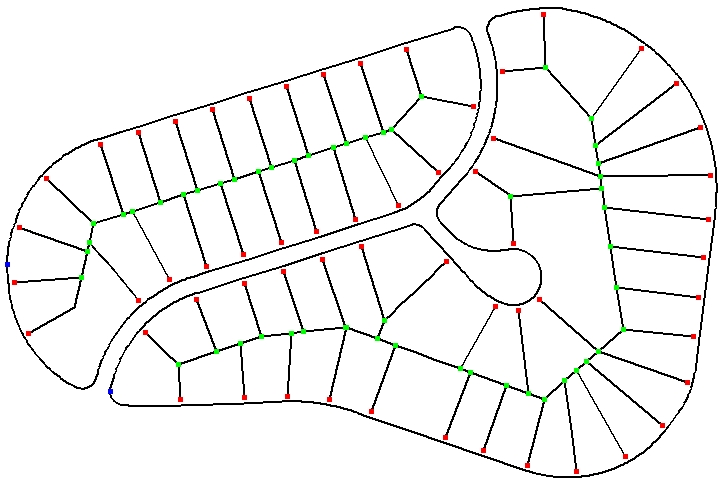
If we analyze the nodes of the merged polyline dataset (Use the Export Nodes function of ET GeoWizards we'll see many dangling nodes and this is normal because the outline of the original polygon was buffered.
STEP 6: Use the Clean Dangling Nodes function to extend the original internal
boundaries to the new outline.
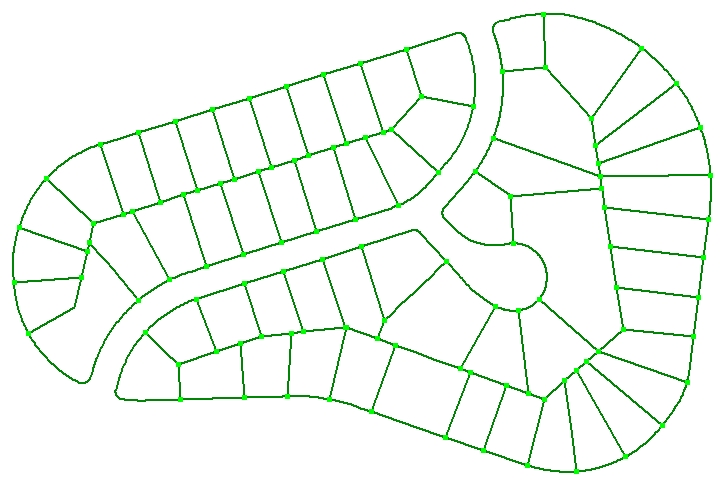
Now we have polyline data and can build polygons from it.

STEP 7: Use the Polygon To Point with "Label" option or
Polygon To Deepest Point functions to get the labels from the original
polygons. We'll need the labels to be able to transfer the attributes from the original polygons to the new ones. Since we need the points to be
as far from the boundary as possible, the better option is the Polygon Deepest Point function
The image on the left shows the cleaned polylines overlayed with the label ponts created in this step.
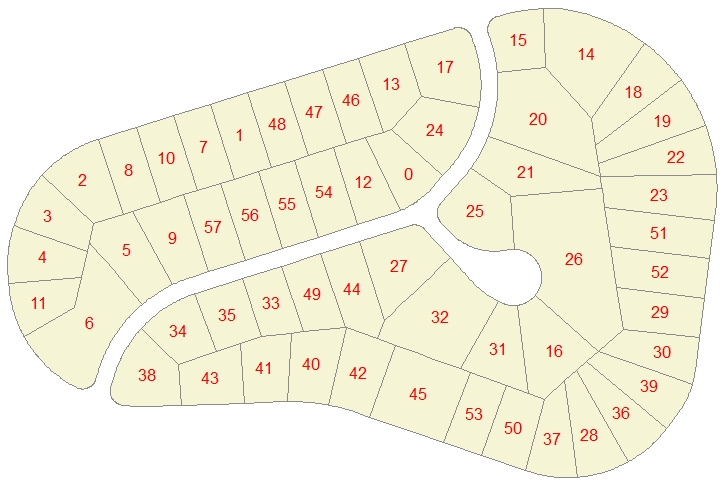
STEP 8: Use Build Polygons function on the polylines created in STEP 6. and label points created in STEP 7.
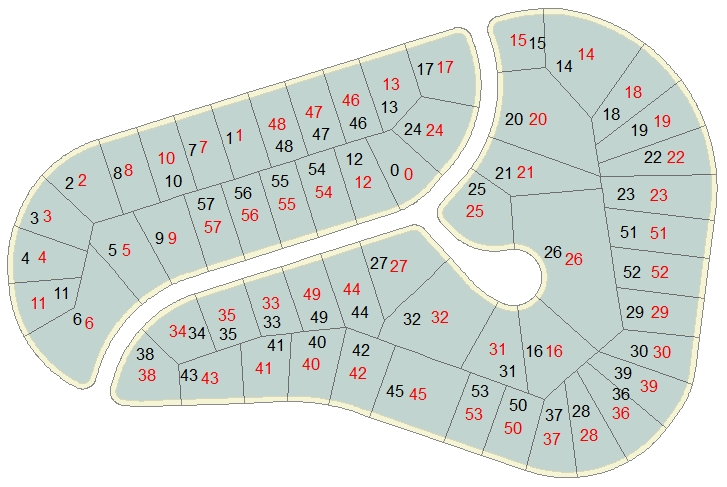
Resulting polygons overlaid with the original ones. Both layers labeled with the polygon IDs
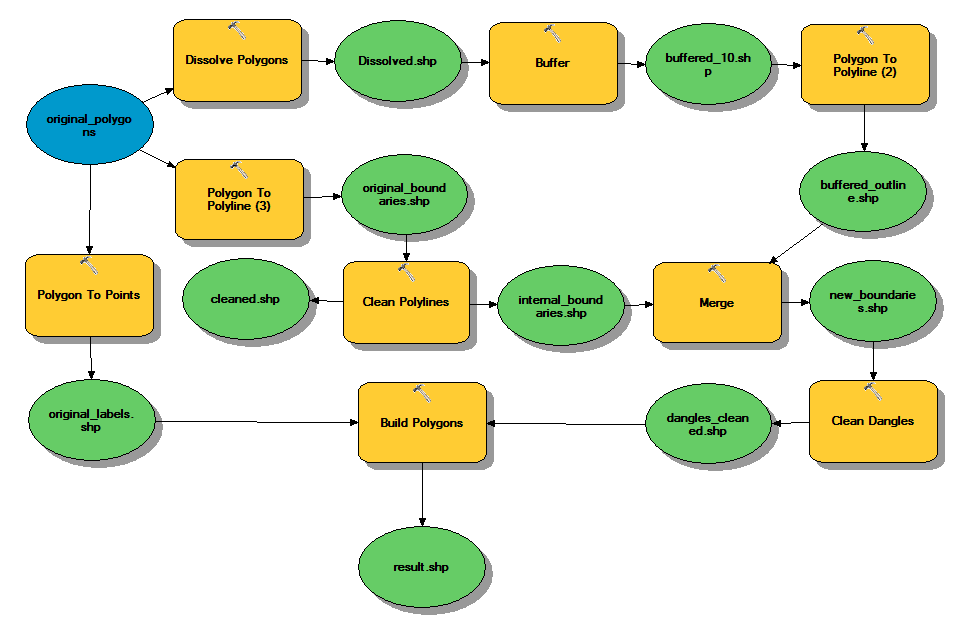
Sample Model of the entire process (ArcGIS Desktop and ArcGIS Pro only)